The main features that have been enhanced in the CADmeister 2023 released this time are as follows.
3D Data Utilization
3D Similar Shape Search You can search for shapes that are similar to the
specified 3D shape.
You can search for similar shapes created in the past for 3D surface shapes and make diversion designs based on the expected deformation amount and type design data.
You can also use relevant information such as estimates and defects. The search can be for the entire shape, but also for a part of the shape.
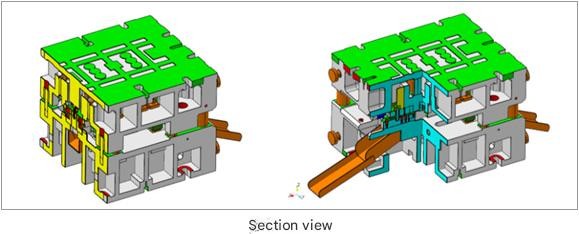
Transmission of information to the next process It is now possible to create cross-sectional views on the
3D model.
The inside of a 3D model cannot be seen when it is shaded, but by adding PMI to the cross-sectional view, it is possible to convey information more clearly.
It can be expected to have the effect of promoting 3D data distribution in the later process.

Quality Improvement
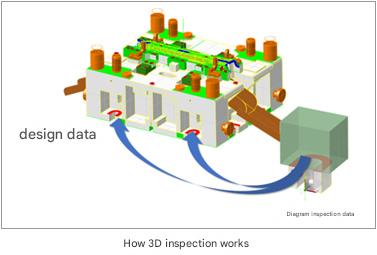
3D Inspection (Stamping Die)
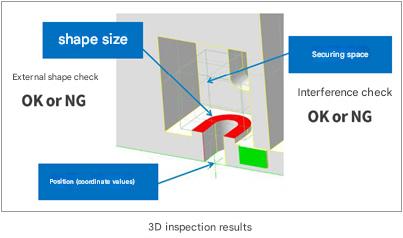
Automates the inspection of 3D design data.
The inspection data (correct answer data) was aligned with the relevant area and the shape comparison was automated.
This reduces the number of inspection man-hours.
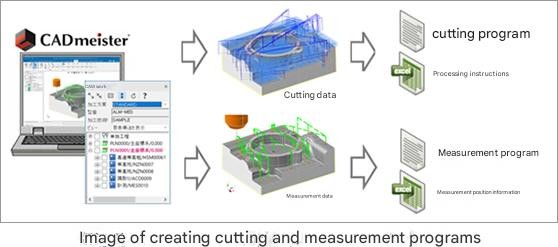
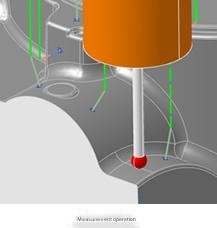
cutting on a machine tool (machining center), NC data can be created to measure machining accuracy on the machine without changing settings.
There are two measurement methods: "automatic measurement using measurement macro" and "manual measurement using handle operation", which allows you to create a measurement program that does not interfere with the product shape and touch probe.
Based on the normal vector of the measurement point on the product surface, the optimal measurement direction can be automatically determined according to the measurement method, and the movement movement when measuring multiple locations can be optimized, thereby reducing the man-hours of quality verification work.
Automates the inspection of 3D design data.
The inspection data (correct answer data) was aligned with the relevant area and the shape comparison was automated.
This reduces the number of inspection man-hours.
cutting on a machine tool (machining center), NC data can be created to measure machining accuracy on the machine without changing settings.
There are two measurement methods: "automatic measurement using measurement macro" and "manual measurement using handle operation", which allows you to create a measurement program that does not interfere with the product shape and touch probe.
Based on the normal vector of the measurement point on the product surface, the optimal measurement direction can be automatically determined according to the measurement method, and the movement movement when measuring multiple locations can be optimized, thereby reducing the man-hours of quality verification work.
Automation and Efficiency
Automatic Creation of High-Definition Machining Paths (CAM) The
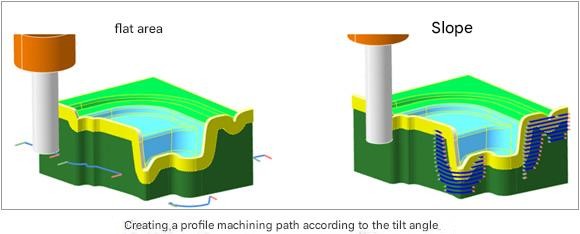
path calculator for 3D profiling automatically detects the path creation range and switches between cutting tools and path types appropriately depending on the inclination angle of the profile line and the blade width of the profile face.
By utilizing the automatic machining path creation function that matches the shape, such as machining using the root side with less tool toughness in flat areas, and cutting and cutting in areas where the machining load is high, such as inclined areas, the quality of the machined surface is improved.
Excel-linked mold base template design (mold mold)
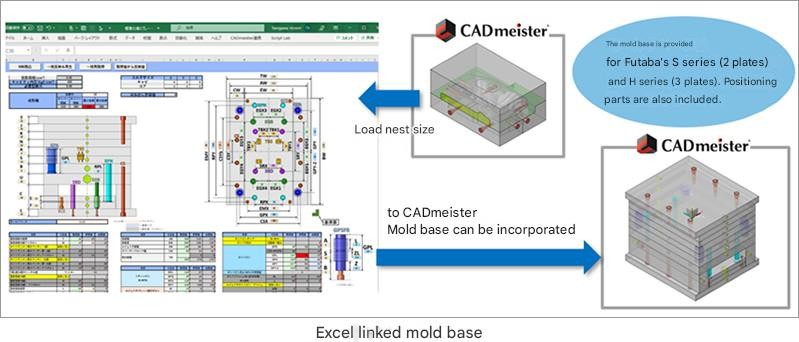
Based on the projection area, nesting size, and molding machine size information of the product, it is possible to easily import the optimal 3D mold base.
You can set and change various parameters in Excel and reflect the information in the template mold base.
The mold base is available with 2-plate (S series) and 3-plate (H-series) templates of Futaba.
Post-call editing is also possible.
Powered by Froala Editor
Powered by Froala Editor


 EN
EN
 TH
TH
 IN
IN
 VN
VN
